



The side view is the fastest way to recognise a straight-edge icing spatula. The blade continues in line with the handle. On an offset spatula, a step drops the blade below the handle so the working edge can stay close to the frosting while your fingers remain above it.
Straight-edge spatula drawing
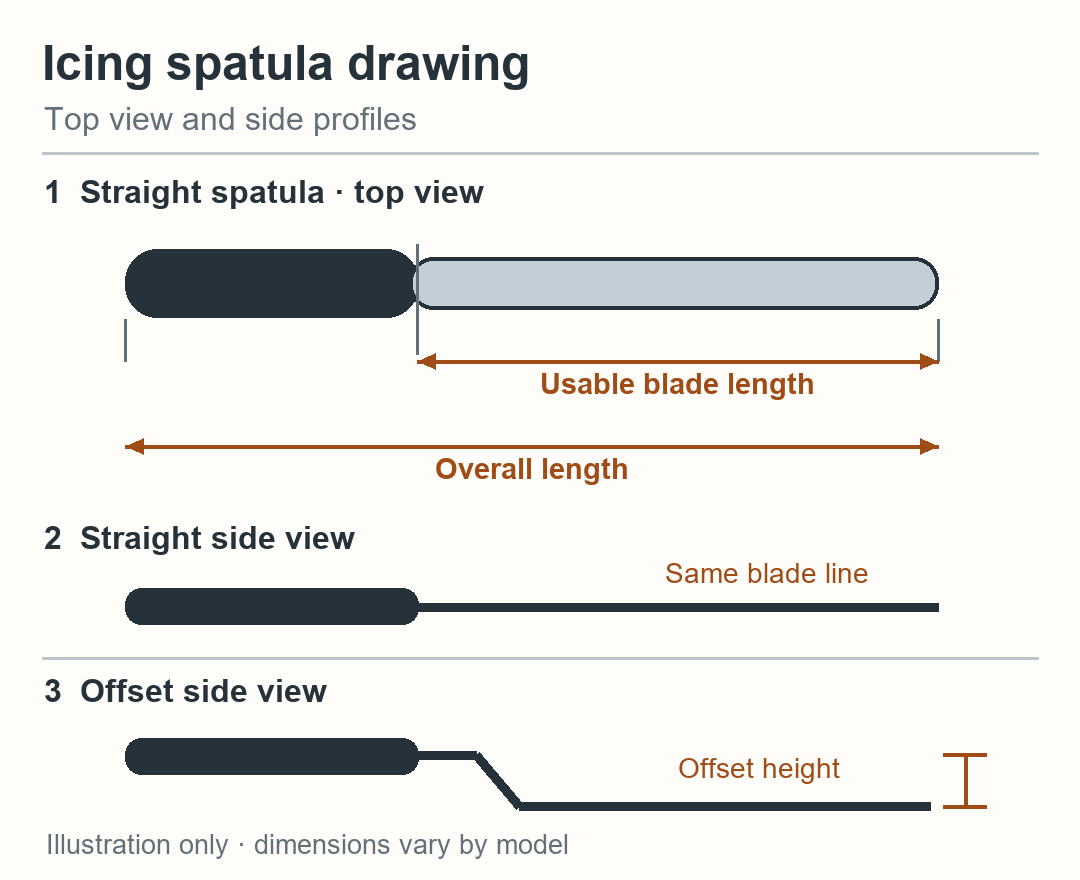
How to read the views
- Top view. Shows the blade outline and the grip. The tip is rounded on the illustrated example.
- Straight side view. Shows the blade continuing from the grip without a step.
- Offset side view. Shows the bend between the grip and the working blade. Offset height is the vertical difference between the two levels.
How to draw it yourself
- Draw a long centre line. Outline the wider handle on one end.
- Add the working blade and tip on the same line in the top view.
- Project the handle and blade into a side view. Keep the blade aligned for the straight tool. Draw a step at the neck if you need the offset version.
- Mark overall length and usable blade length separately. Add blade width to the top view and thickness to a separate side detail if you need to specify it.
Measurements to label
| Label | Where to measure |
|---|---|
| Overall length | From the back of the handle to the end of the blade. |
| Usable blade length | Along the straight working section from the neck to the tip. |
| Blade width | Across the working edge in the top view. Mark the measurement location if the blade tapers. |
| Offset height | Vertically between the blade line and the handle-side neck line. |
To see how the profiles are used for decorating, read Straight Edge Spatula: Uses and Straight vs. Offset.